Spars and details
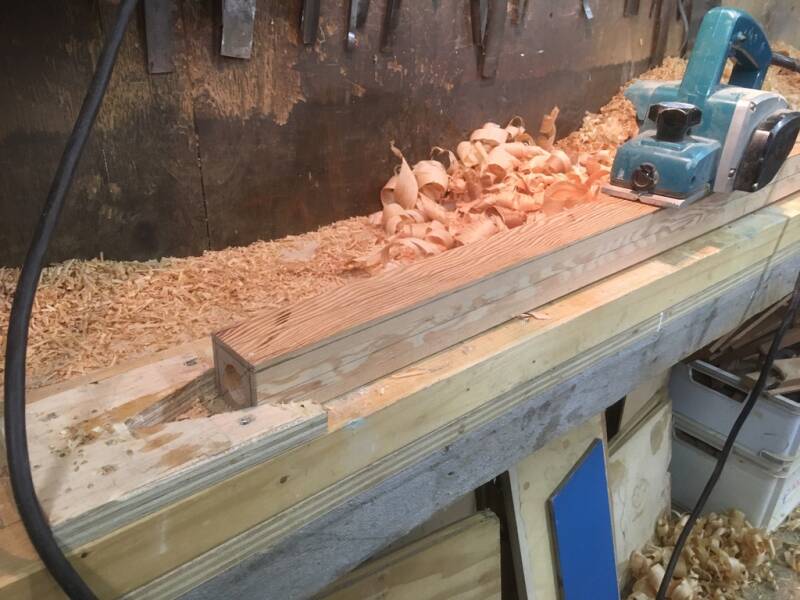
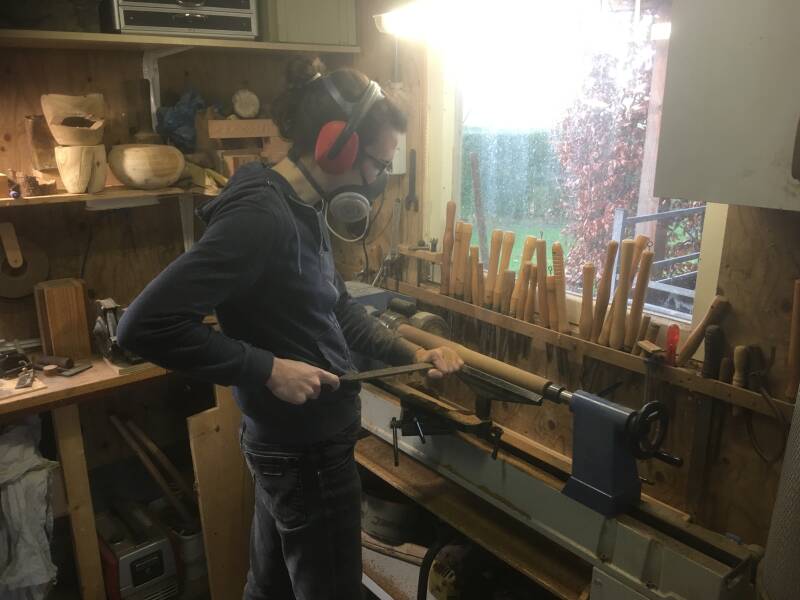
Making a pole
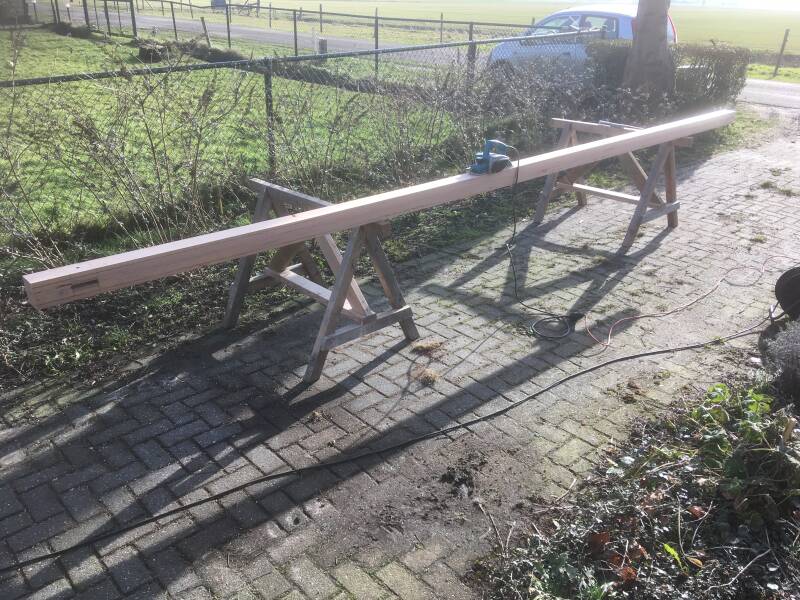
We started making the pole. Since this spar is the smallest we used it as tryout before working on the real stuff like the yard and and mast. They are all made of Oregon Pine which is pretty hard to get around here. It took a while but luckily we found some nice planks.

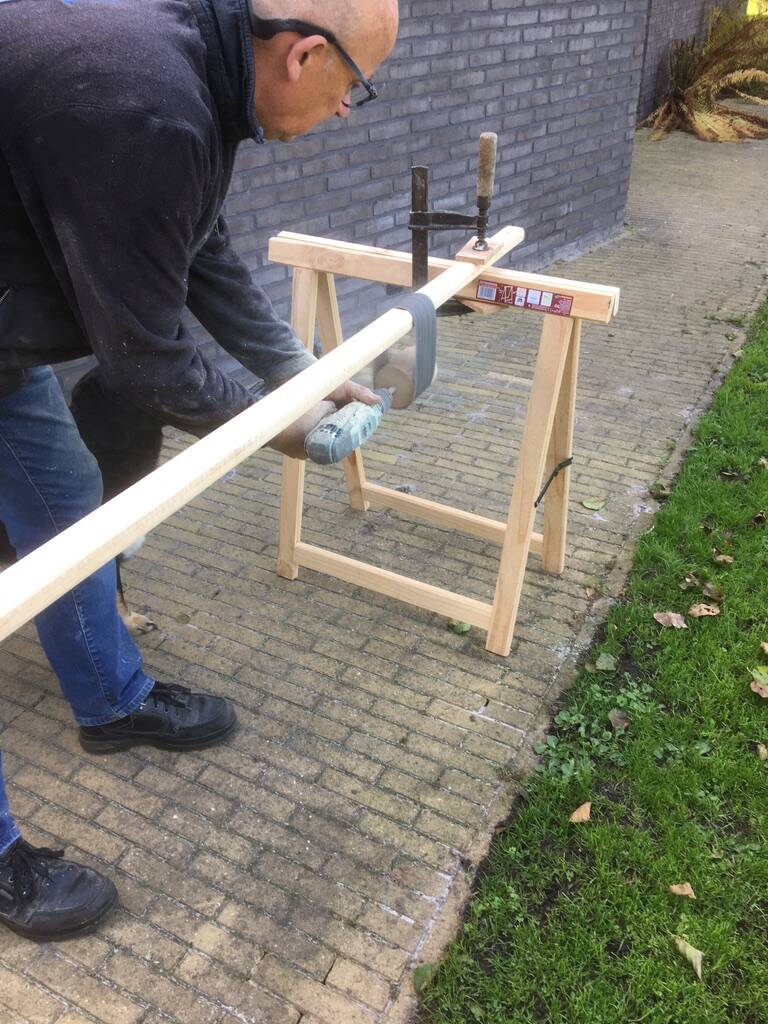

Sanding the pole.
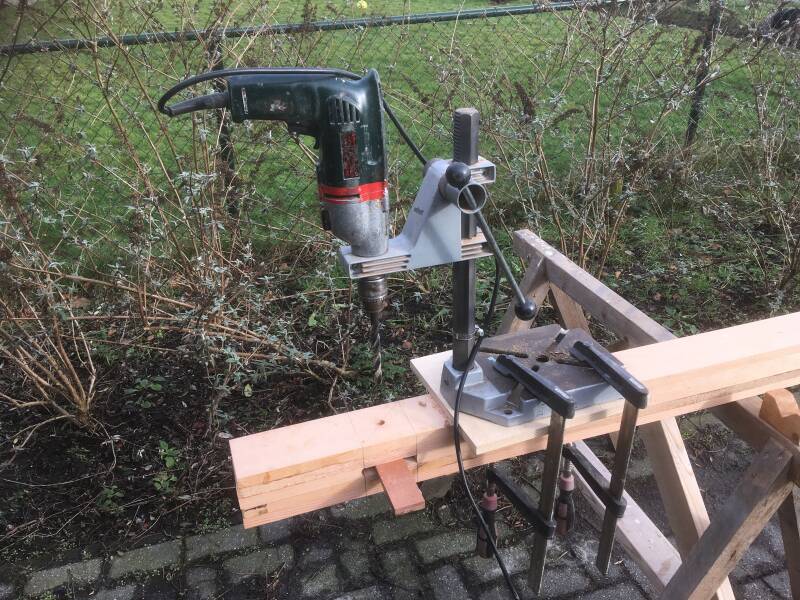
Using a sand belt inside out.
Esger made the drum for the drill.

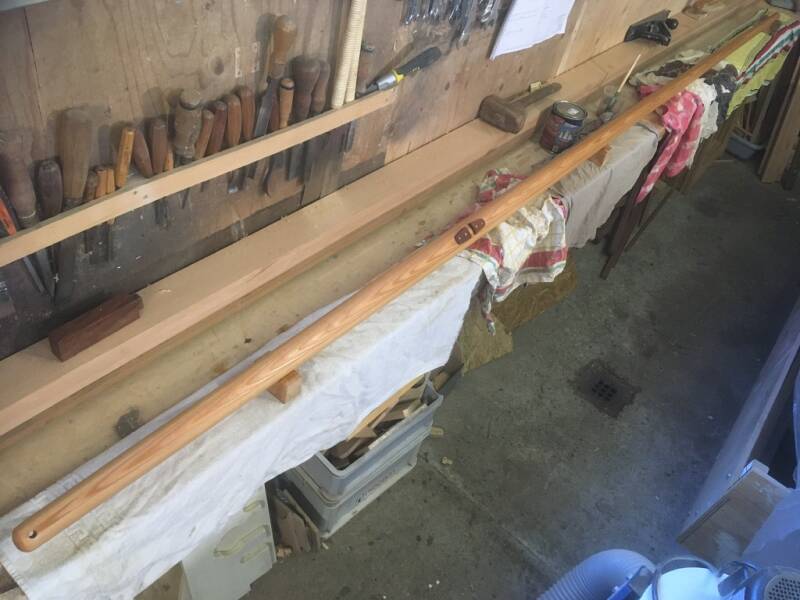
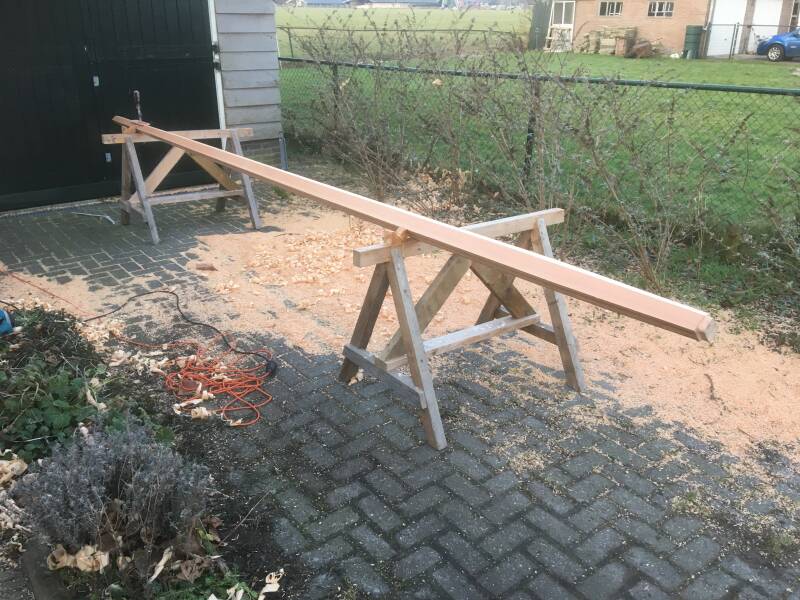
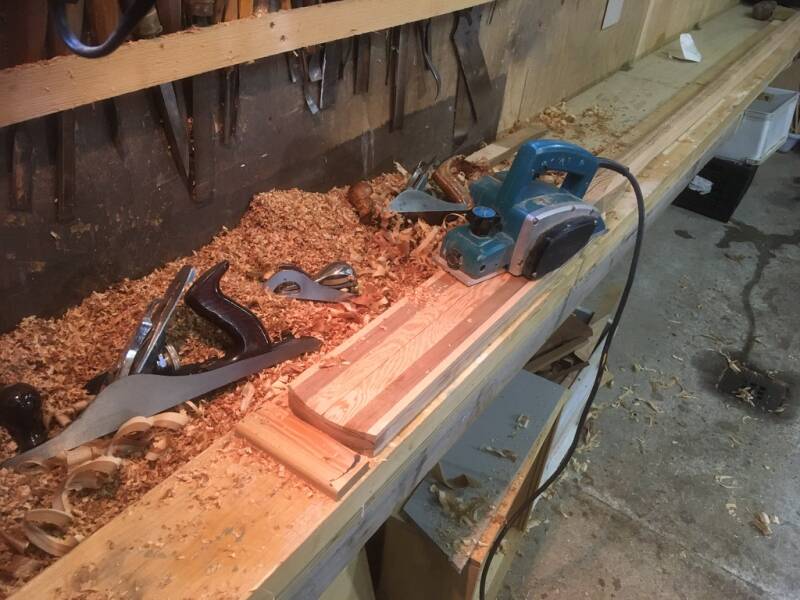
We finished sanding the pole and we are pleased with the result.

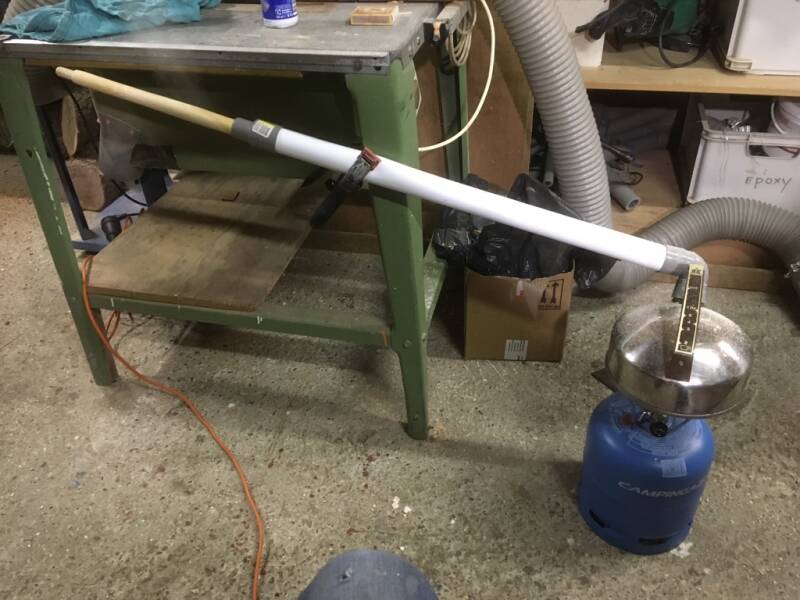
After three layers of DD-lacqer we applied hoists to the pole ends and satiated them with varnish and covered the pole with 5 layers of clear varnish.
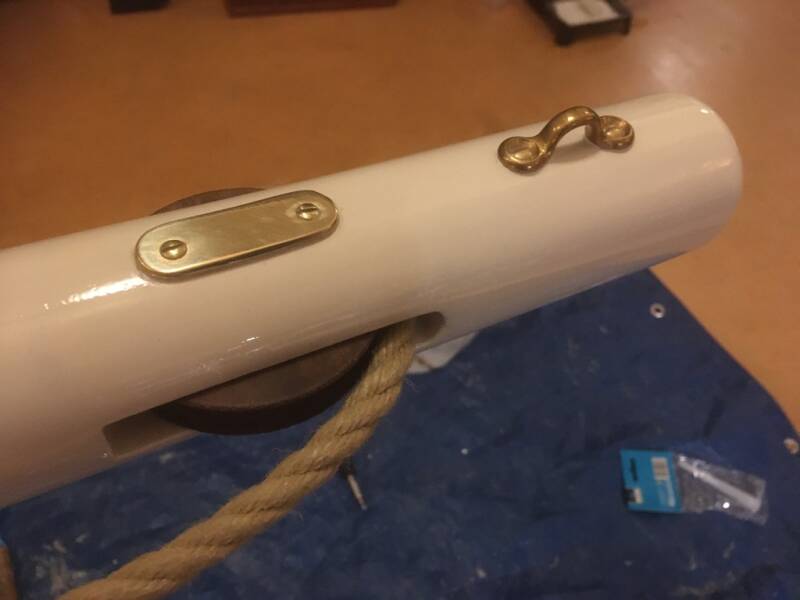
Belay pin
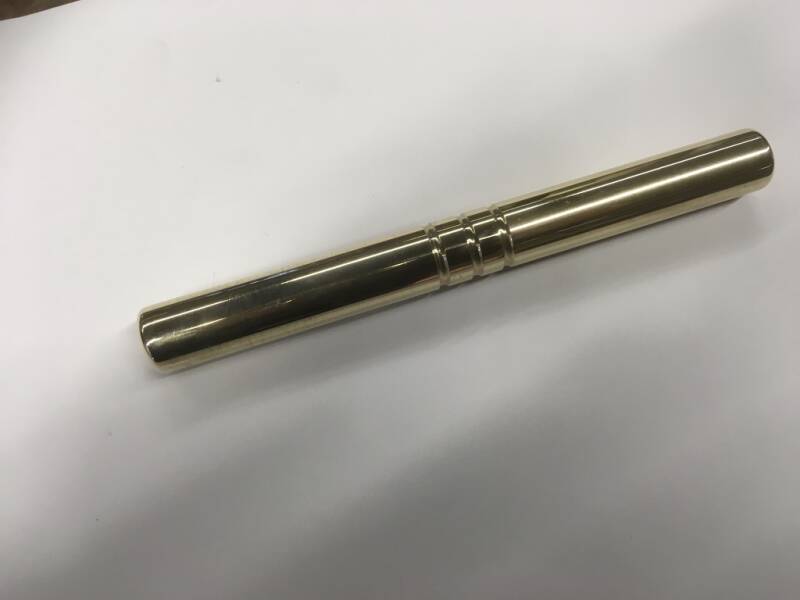

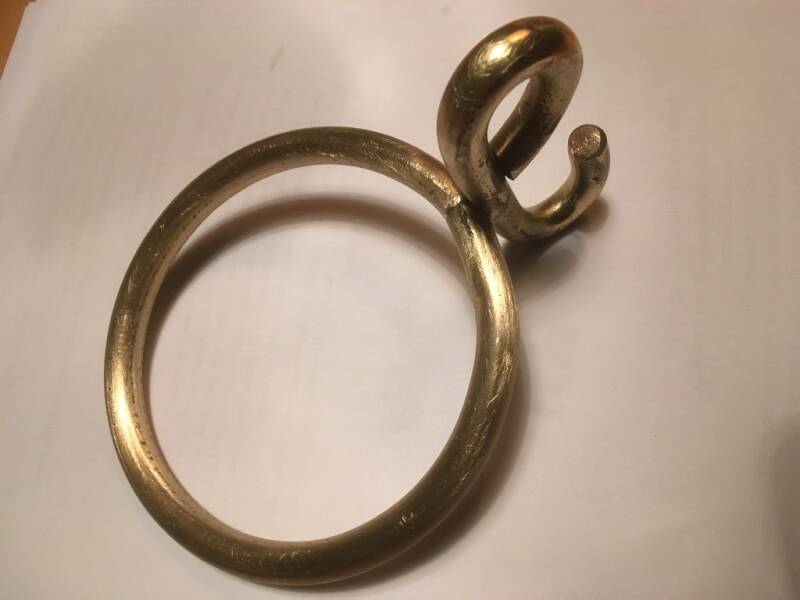
We made a brass belay pin for the stem.
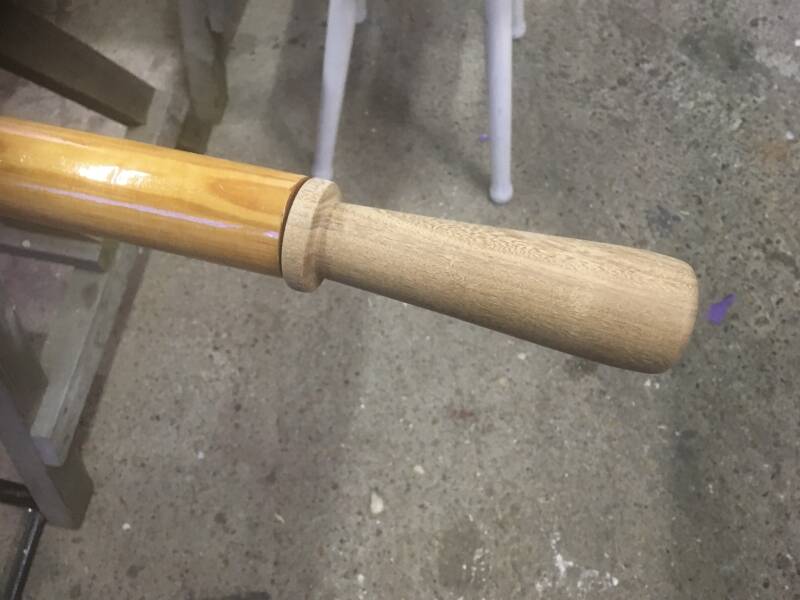
A steam bend ensign staff
While waiting for a wood order we started making a steam bend ensign staff out of scrap wood.

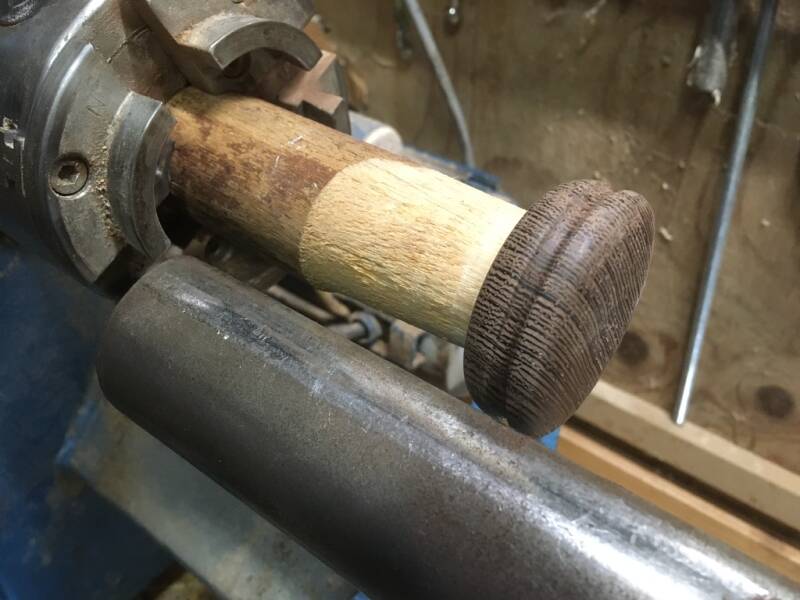
Using the lathe Esger made an ensign staff out of a strip of American Ash wood. It will be placed at the end of the tiller.
Making the cap out of Wengé wood. (A small piece had been lying around in the shed for more than 30 years!)
Steaming the tip of the ensign staff in our improvised steamer.


Bending it on a mould wrapped with strips of rubber from a car inner tube.
The ensign staff done and placed at the and of the tiller.
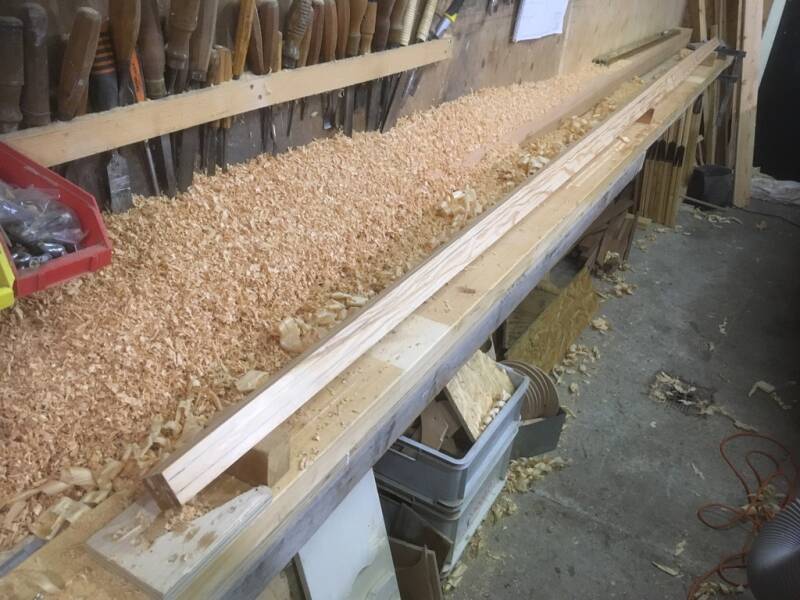
Making the Yard

We glued five planks of Oregon Pine together for making the Yard.
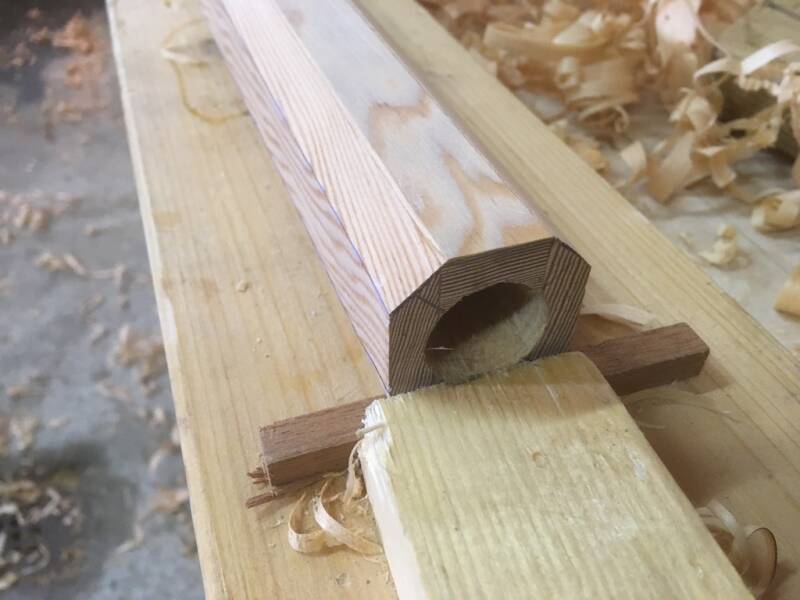
Planing it down to 6 X 6 CM


Using a improvised line helping tool (Spar gauge)


The blocks we made for gluing the stem came in handy again.
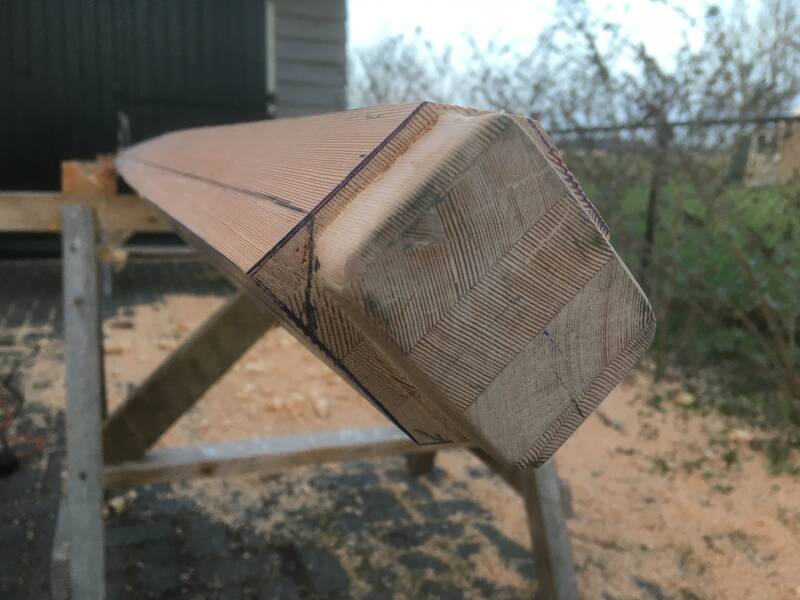
Now it was easy to make it octagonal


The octagonal end.
Using a spook shave to make it more or less 16 angular.
Sanded with a reversed sand belt.

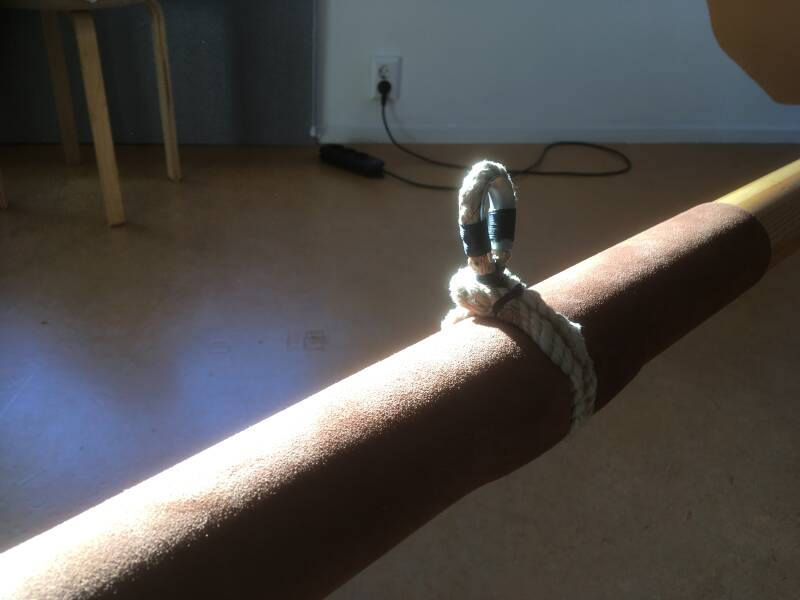
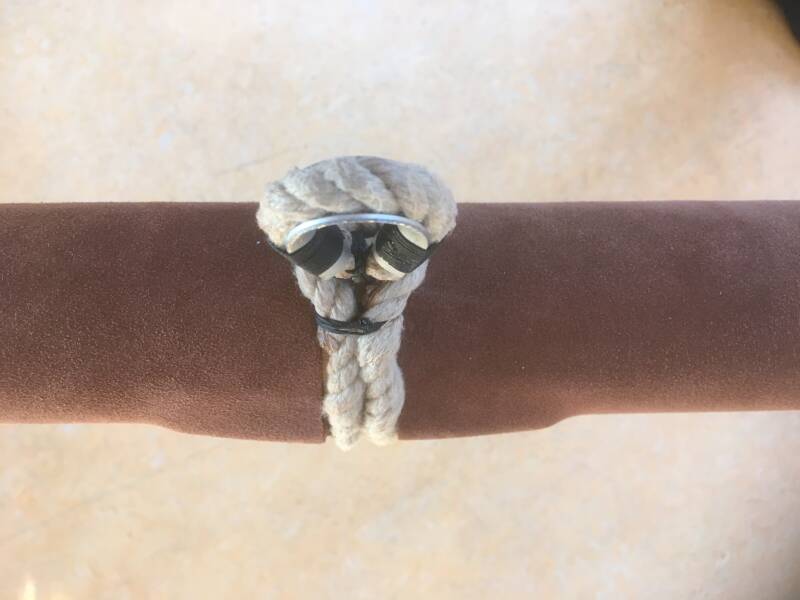
Two wooden stopblocks to prevent the hoist line slipping.
Soaking the yard in Owatrol Decks 1 Olje
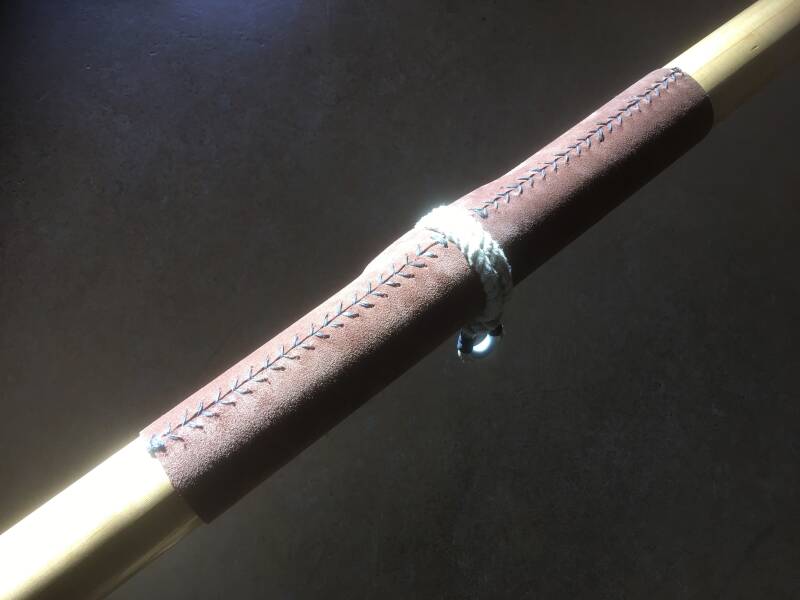
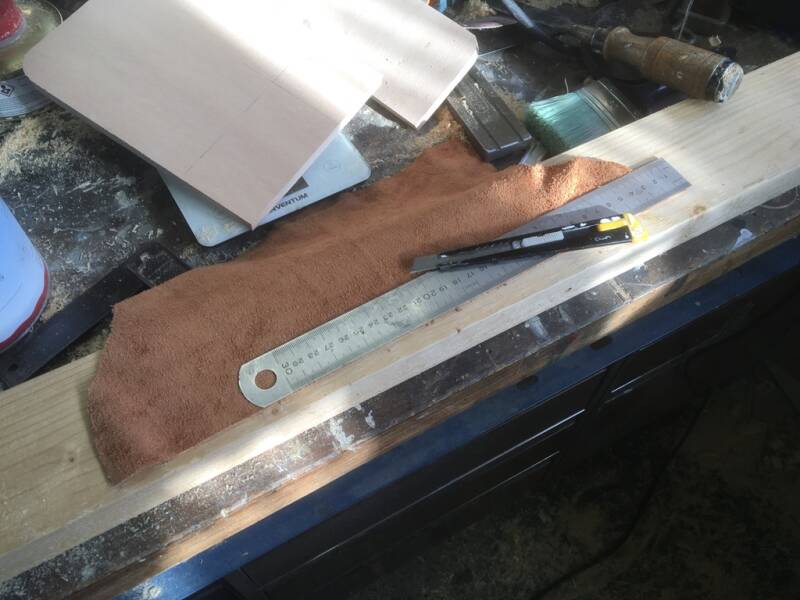
Stitched some leather around the yard after soaking the leather in warm water first.
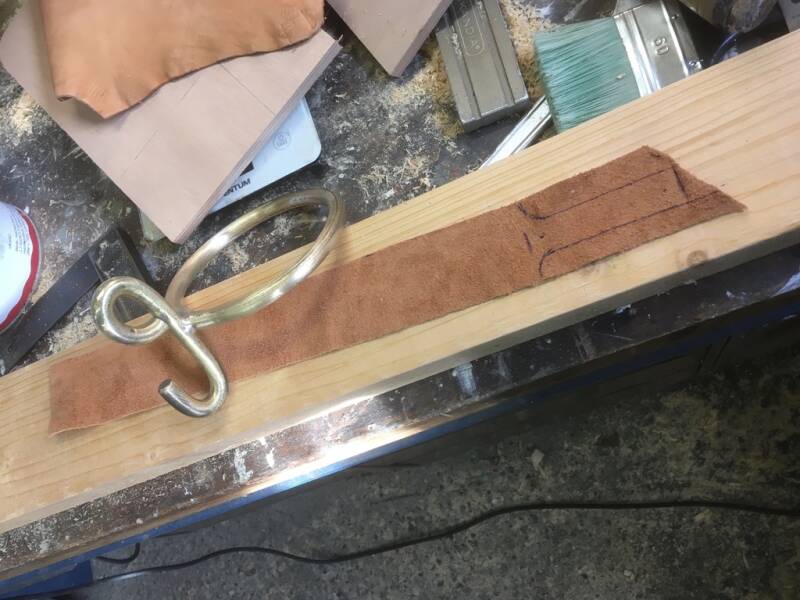
Made a loop (or noose) for the Yard
Here you can see the wooden stopblocks hidden underneath the leather
The Sail


Rik Huisman from "Huisman Zeilen" is a friend of ours and he made this beautiful sail for our Ilur.
We laid it down in our yoga studio and laid the yard beside it to see how it would look. We are very much pleased!
Making a traveler


Making a traveler out of brass wasn't easy. It was hard to bend the rod in a smooth circle. We used a plate mill to do so.
Pleased with the fine silver soldering.
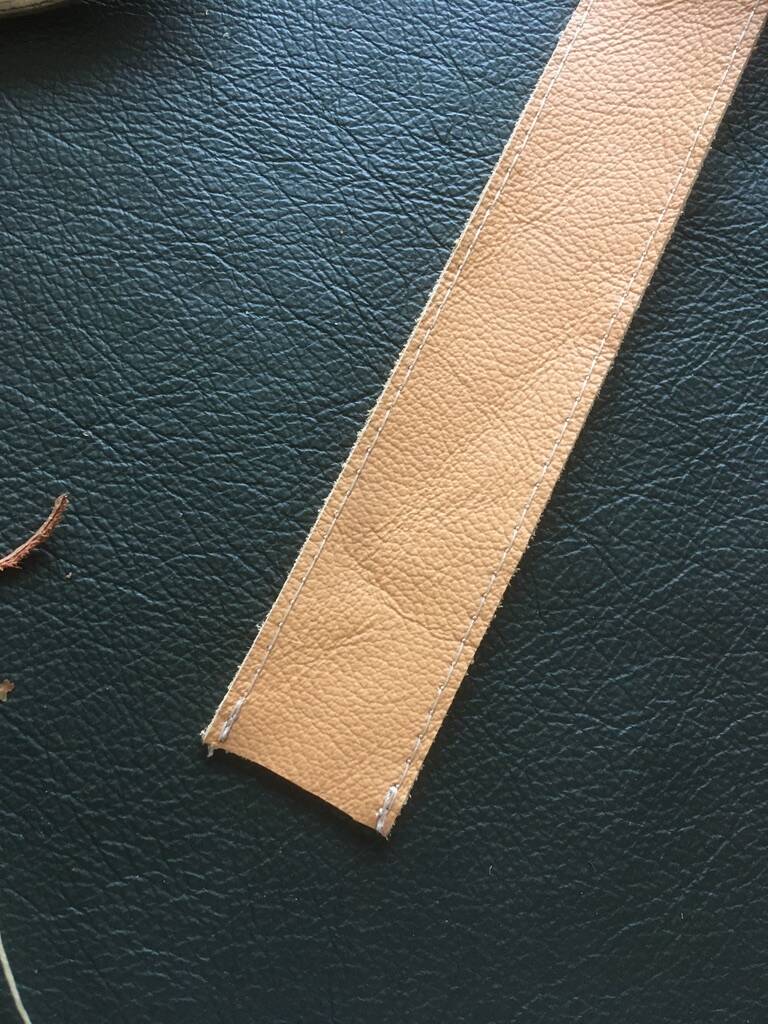
At home we still had some small leather swatches to make a choice.

Cutting the leather
I made an overlap to cover the entire ring.
A first attempt covering the traveler with leather didn't work out too well. I didn't realise the leather strip would shrink in length when you sew the sides together.
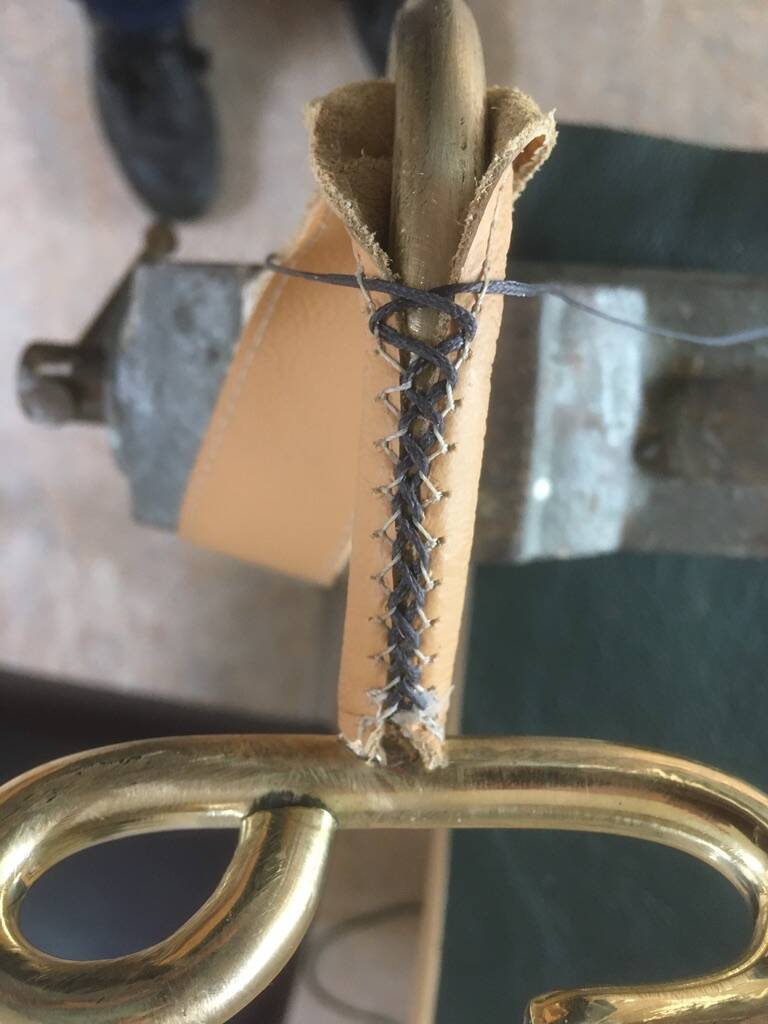
On the second attempt I used a diamond stitch often used by English folks making a steering weel cover for their sports cars.


It worked out great and I am pleased with the result.
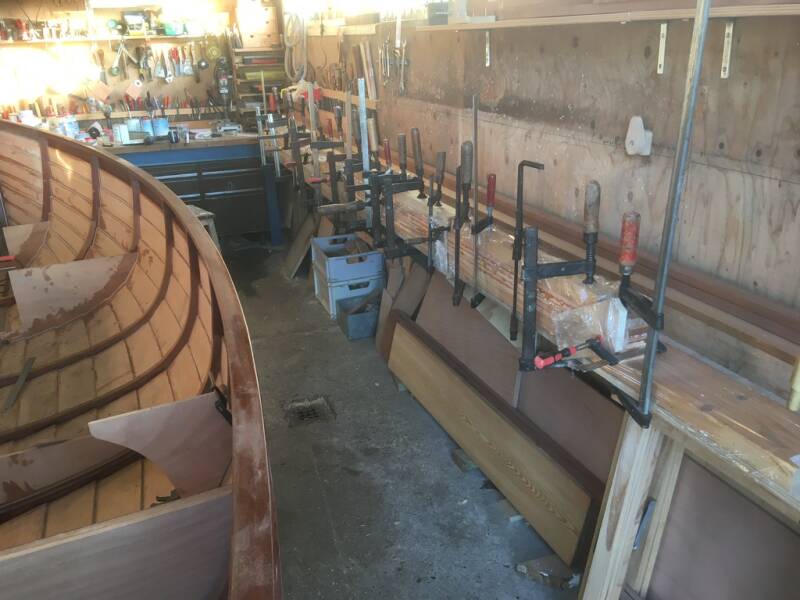
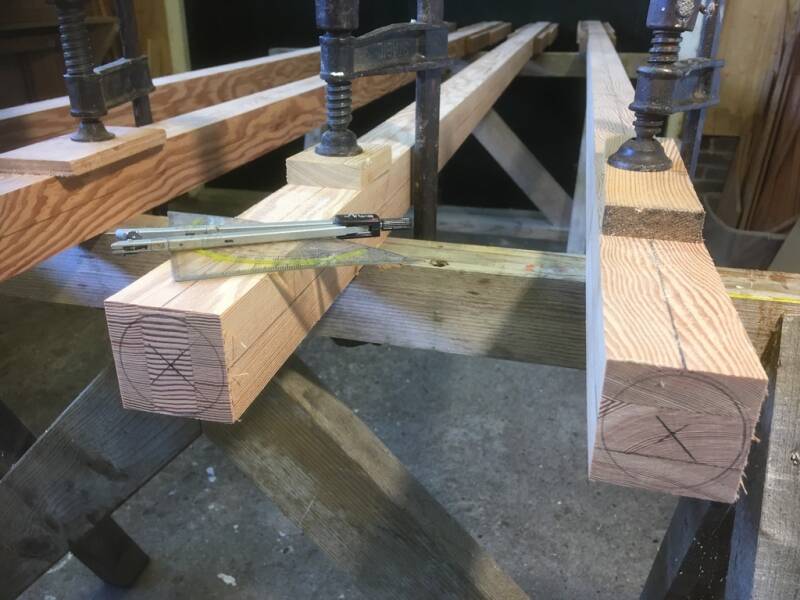
Making the mast


The mast is also made out of 5 Oregon Pine planks. We inserted two plywood sheets at the location of the pulley to avoid tearing.


The long work bench Esger made now sure came in handy
Planed it square and right-angled
We drilled a 12 mm hole for the axle before we started shaping the mast so it would be straight.
Roughly shaping the mast using a power plane
Making it octagonal.

Here you can see the foot of the mast.


A whole day of planing and sanding with the reversed sand belt on the drill.
Finally it is round!

After painting the tip of the mast white we placed the sheave and made two brass plates to protect the axle.
We also placed a smal brass bracket in case we want an extra line in the mast.


We then applied lots of layers of Decks 1 Olje

A leather protection cuff attached to the bottom of the mast

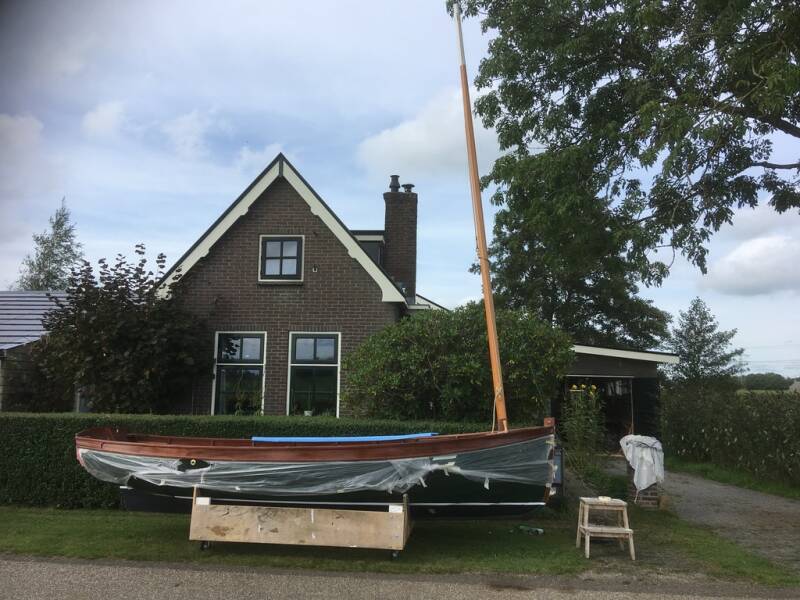
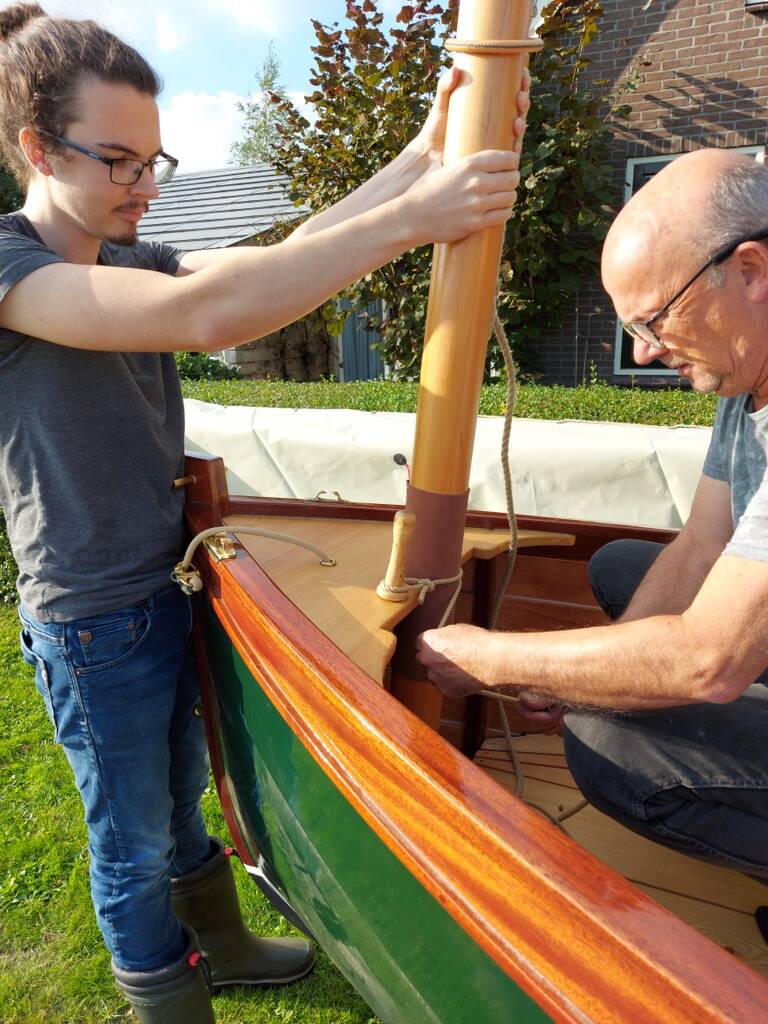
It is September 2021 and we tried to place the mast but it was leaning too far back.
Okay this is better ..... 7 degrees!


Hoisting the sail for the first time

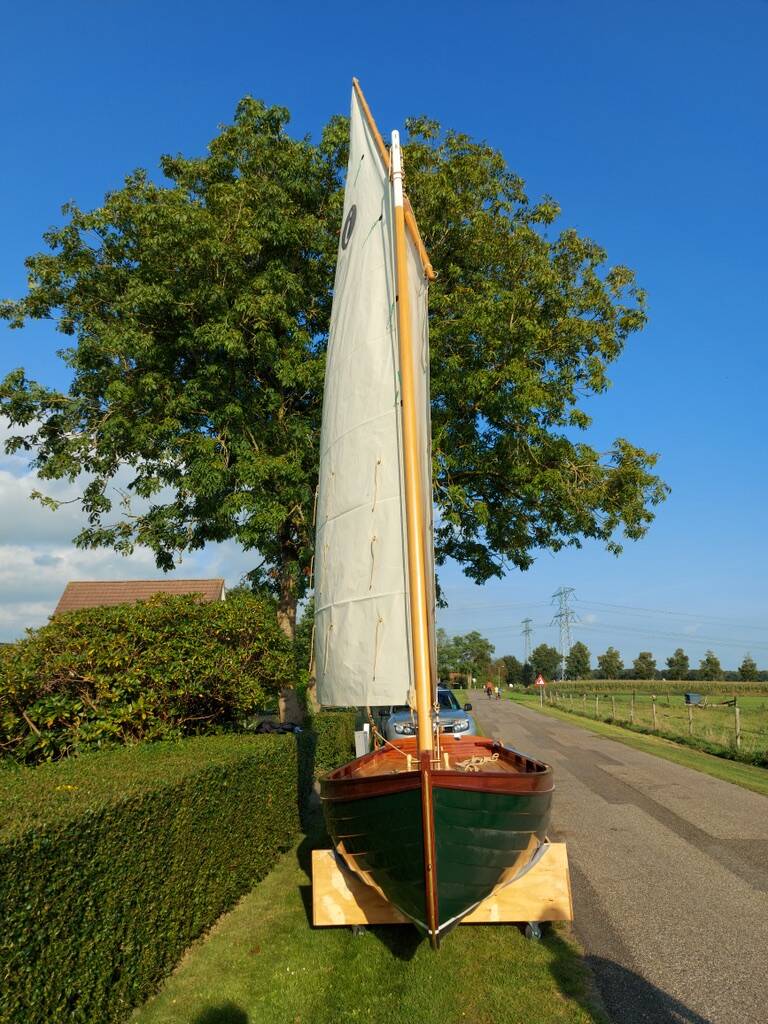
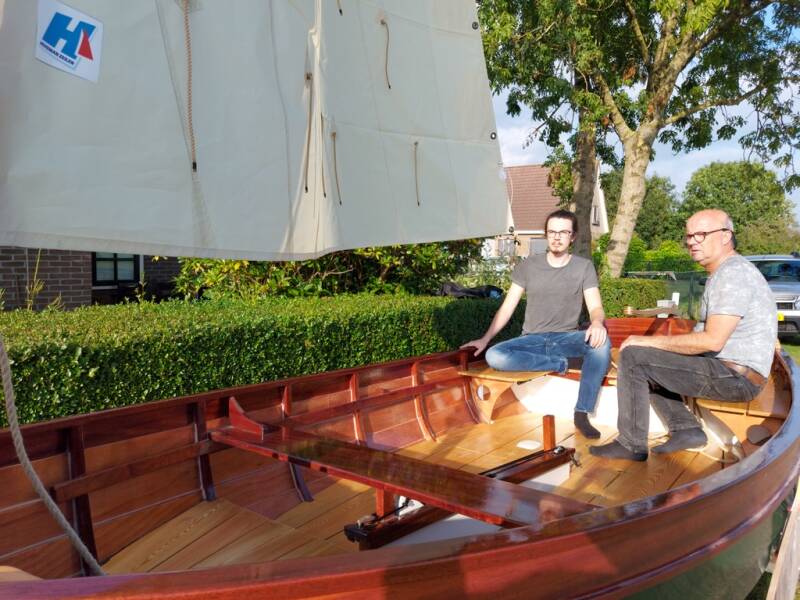

Two proud builders sitting in their home-made boat.
Name and place


Painted the hometown in a classic font.
The name Aries refers to Arie van Staveren. My grandfather and Esger's great grandfather. We think we inherited his love for woodworking and even used some of his old hand tools building this boat.
Of course Aries also refers to the zodiac sign of the Ram.
Brass deck terminal
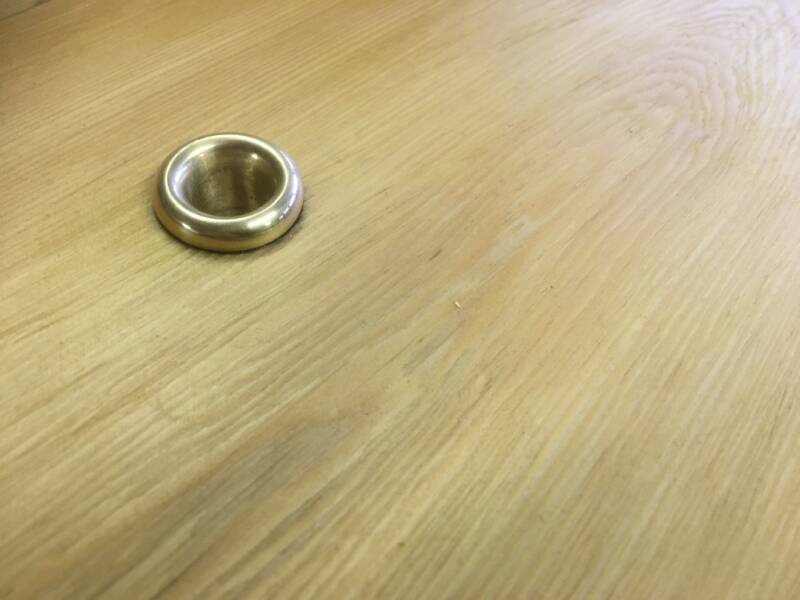
We managed to make a nice deck terminal from a leftover square block of brass
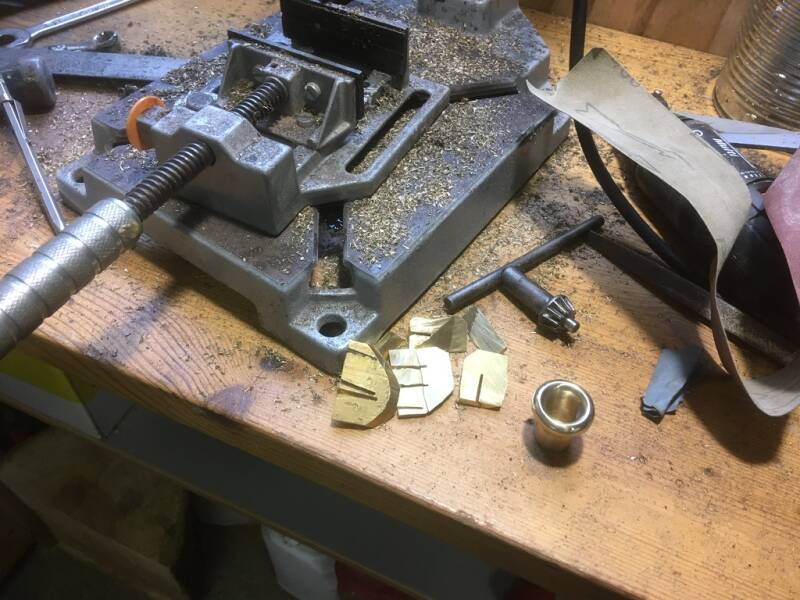
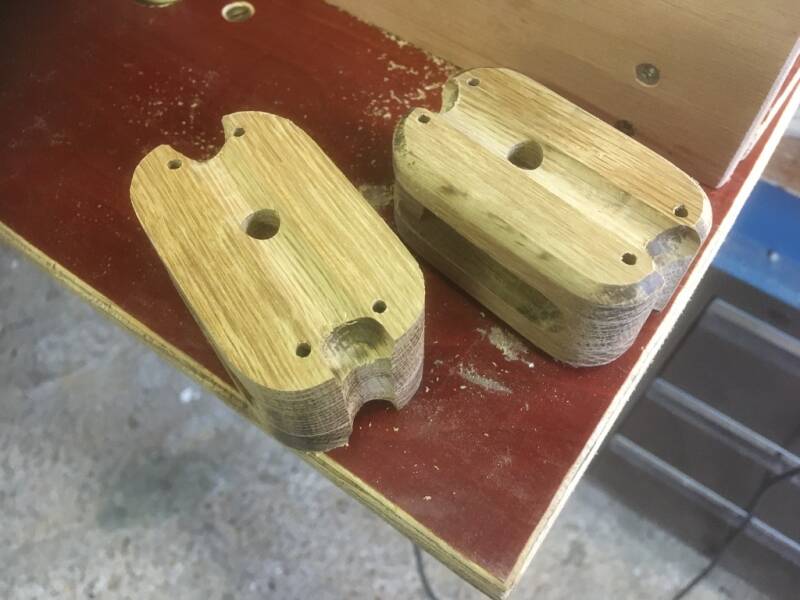
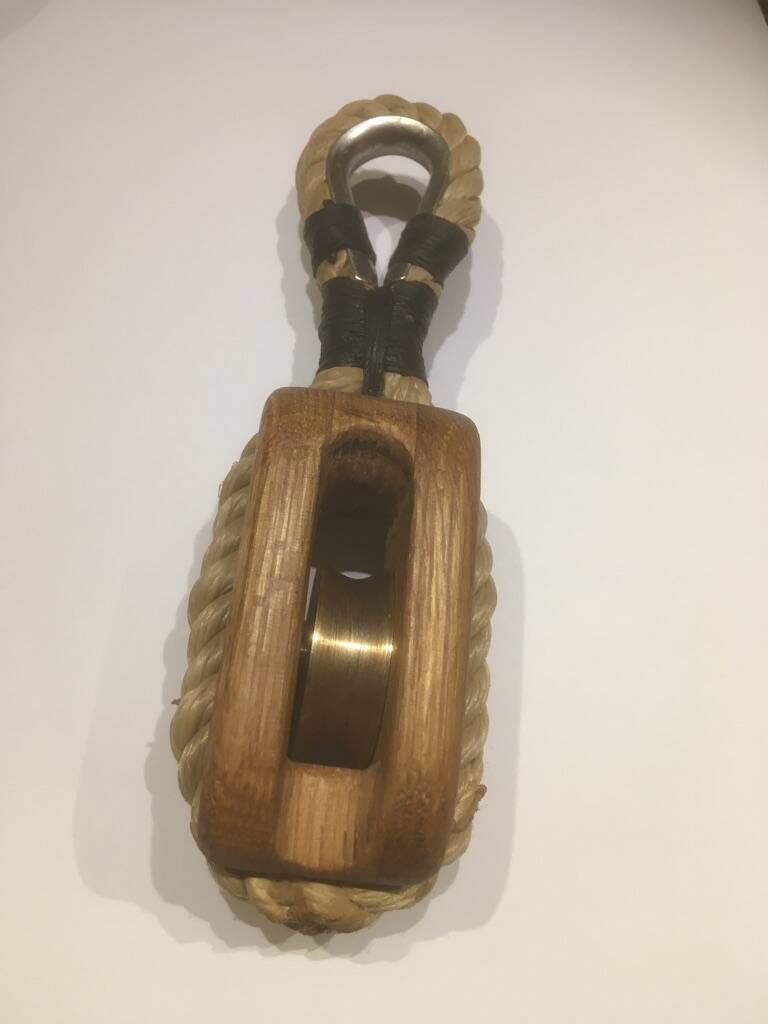
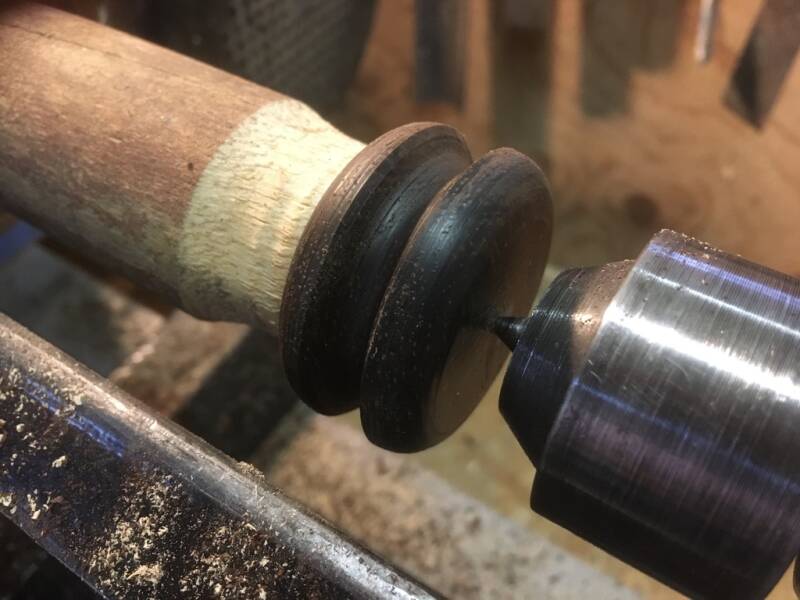
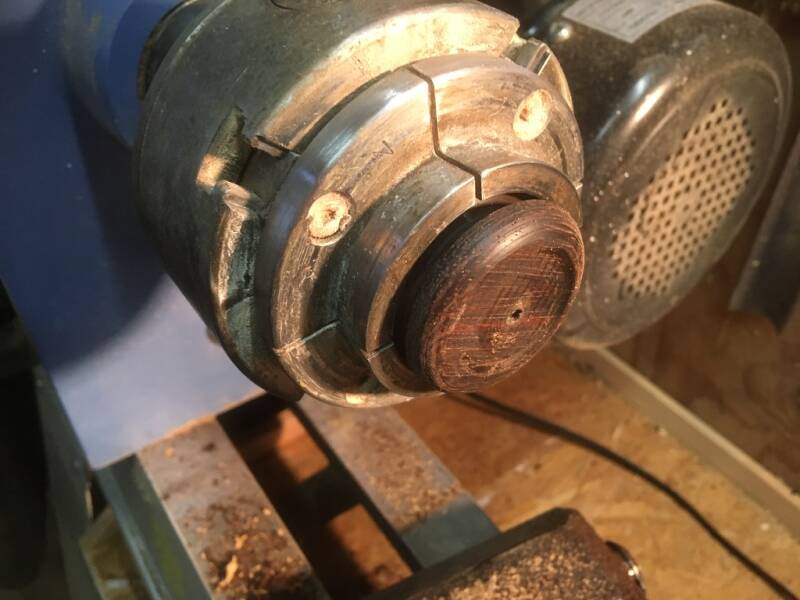
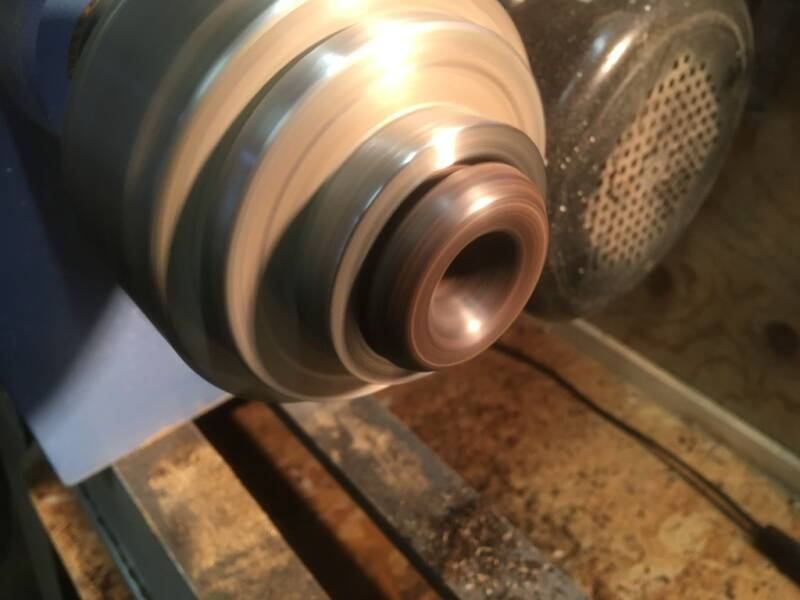
Making wooden strop blocks with brass disks


Working on the metal lathe
The two brass sheaves still have to be polished
We made a drawing first to have some idea how it could look.


Gluing the small pieces.
Using the router to make cut outs for the rope on one side.


We temporarily fitted in a small piece of wood inside to get a clean drilling hole.
Drilling small holes for some copper rivets.


Rounding by sanding the edges.
Used the router again to make a groove in the middle
After making the rivets in we did some extra sanding.


The block soaked in Decks Olje 1
The sheaves inserted and the loop attached

Making a rope loop was more difficult than I thought. I ended up with a twist in the rope. Later perhaps I will make a new one.

The second block went a bit better. This wil be used for the mainsail halyard.


Making a new loop with Hempex rope.
Attached and lined it with it leather. Looking much better!
Making a soft shackle with a Pok Wood ring


I had the luck to find two small pieces of Pok Wood to make rings on the lathe for making a "soft shackle" for the main sail.
The finished soft shackles or sliding thimbles
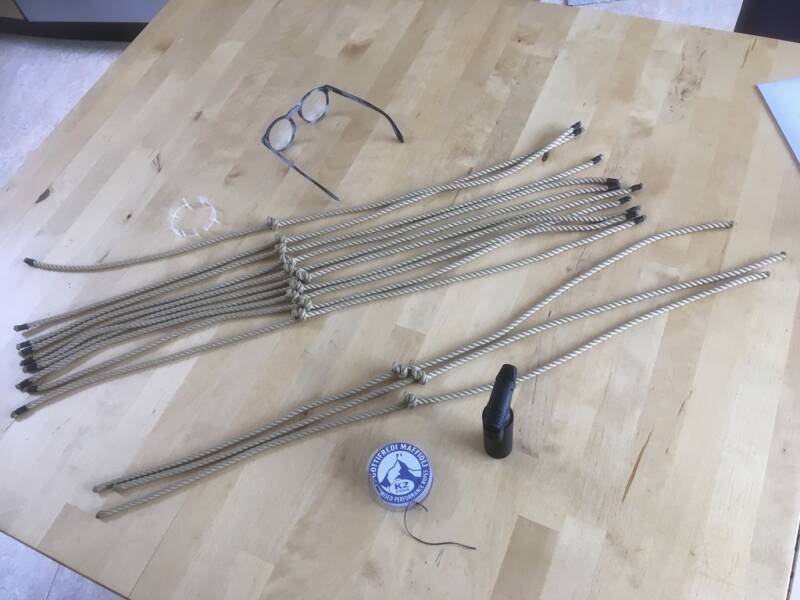
Making cleats and thumbs

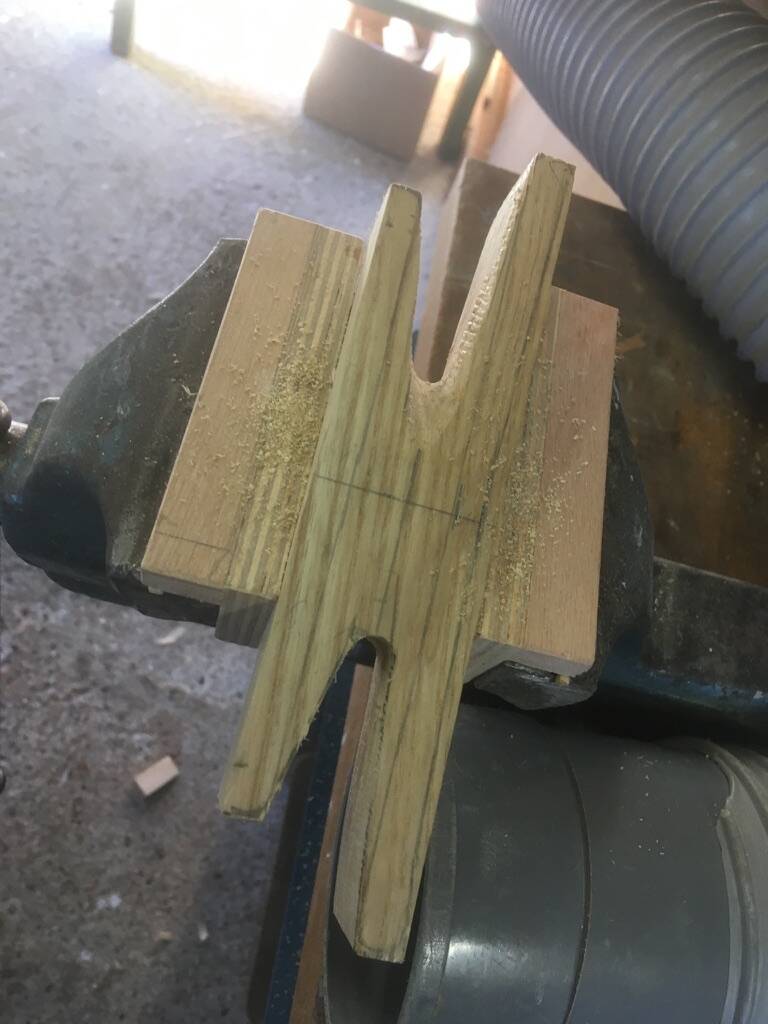
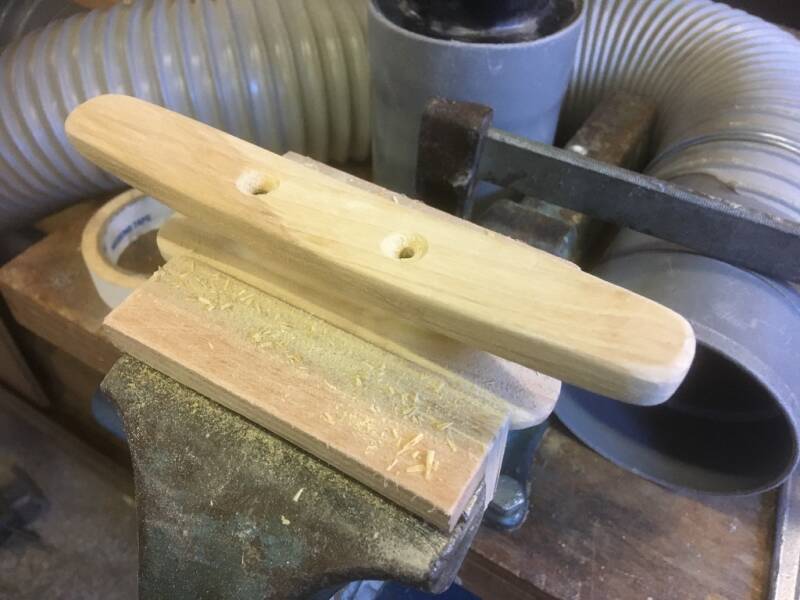
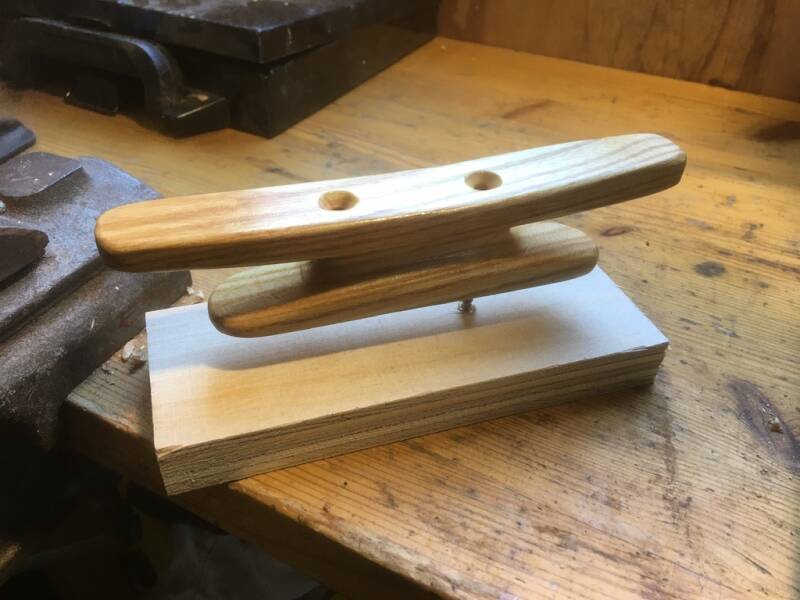
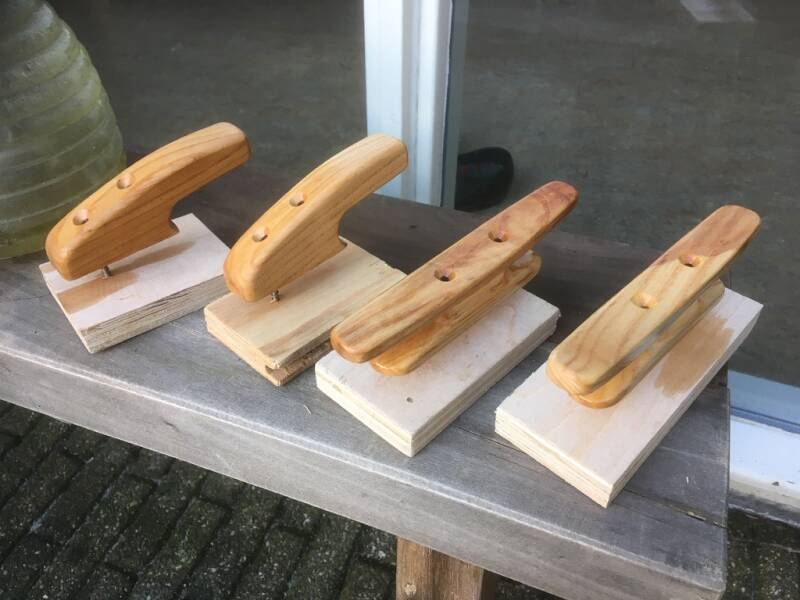
The cleats and thumbs are made of Ash and are soaked in Decks 1 Olje

The thumbs are up!
Splicing rope and attaching the reef knitters to the sail


Making oars


Now it is almost the end of May and finally the temperatures are rising a little so we can work with Epoxy glue again after a long cold period. We started making 4 rowing oars!
An idea sketch for the shape and measurements.


We finished working on the boat first and picked up oar-making again in October 2021!
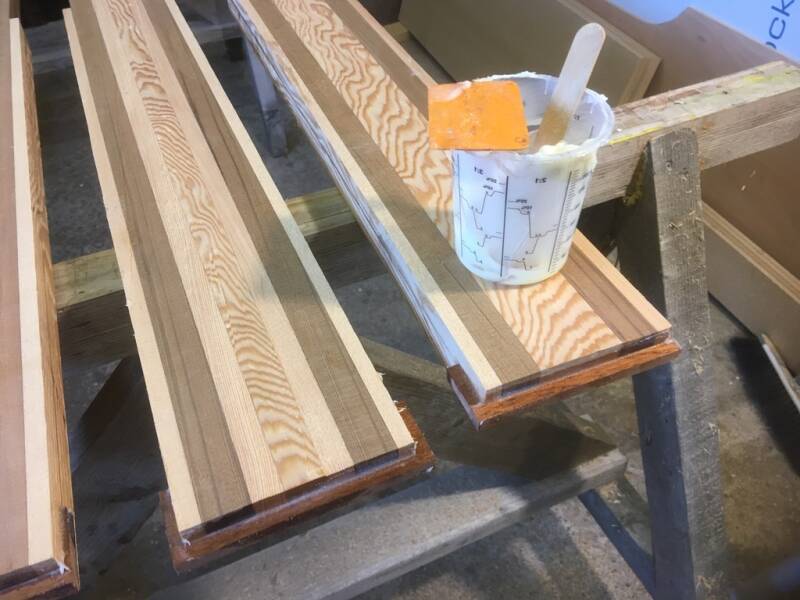
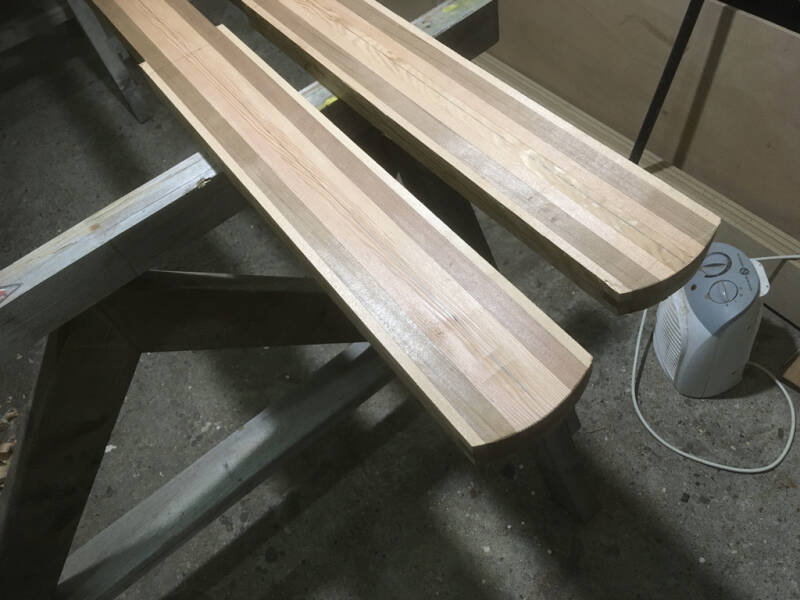
Gluing Red Cedar and Oregon slats onto the Oregon pine shafts


Drilling some holes for the oar handles to fit in.


We inserted a small mahogany slat sideways to protect the tip from extra force or splitting.


Here we have just rounded the tips.
Applying all lines for taper planing.
We even made a cardboard mould to shape the blades evenly.

Taper planing the handle side.
Cutting out the shape of the oar blades with the jigsaw.


We made a spar gauge to plane the oar octagonally. Here we found that a ballpoint pen works better than a pencil.
We used a spokeshave for the inner curves.
Octagonal!


We made another small cardboard mould to determine the shape of the blade tip.
We then decided to make the blade tip a bit thinner.

They're starting to look like real oars.
Using different planes from rough to increasingly finer.

Rounded the shaft.
Finished the edges of the blade.

No. 3 on the workbench.


The oars have been sanded and have had their first coat of epoxy impregnation.
We have reinforced the tips of the oars with 2 layers of fiber glass and epoxy.
Eventually the tips will be painted off-white.

Two layers of DD transparant Lacqer with UV filter and 5 layers of clear deck vanish. Two layers of DD-lacker (Off-white)
Esger started making the teak wood oar handles on the lathe.


We bought these 'hammered' bronze oarlocks. The boatbuilder shop advised these since they are very strong.
The oar pot fits very well!

Oar Lock in place!


Folding and gluing the leather to make a rim at the top of the cuff.
Sewing the oar cuff. Using the wet fit method.


During a trip with my friend Martin in 2024 we noticed the oar cuffs had the tendency to slip through the oar locks. To thicken the rims I made an adjustable cutting tool for leather with a break knife inserted. Than I glued the leather strips around the rims with Bison Tix glue and secured them under a tie wrap to dry. Problem solved!


Rowing on the river Tjonger.
While sailing we leave two oars ready to use lying in the four oar locks.
The sculling hole


First we made a mould to stretch the leather into the shape we wanted, using clamps, after soaking it in water for 24 hours.
Here the leather cuff is glued in the sculling hole.
Pleased with the final result.
lockover fairlead
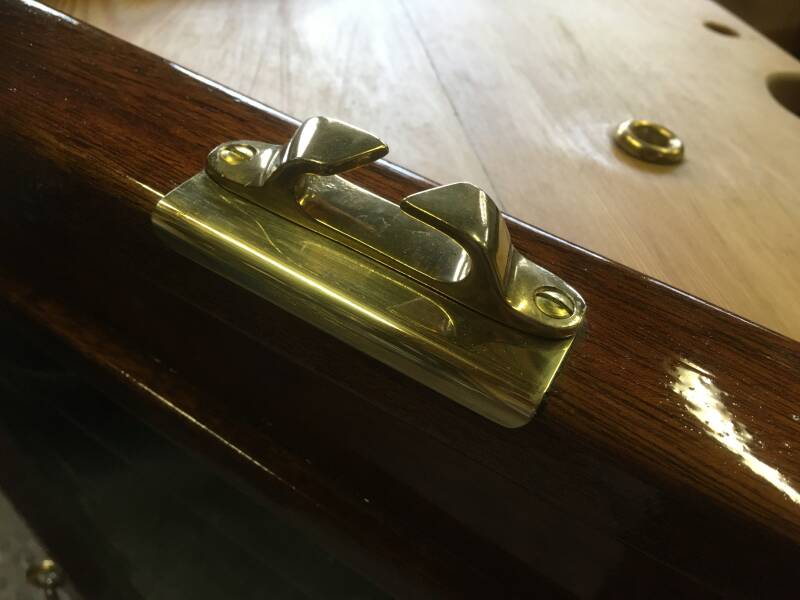

We made a brass plate underneath the fairlead to protect the wood against wearing by lines.
We just love all the brass bling bling..
Some small final parts made out of scrap brass
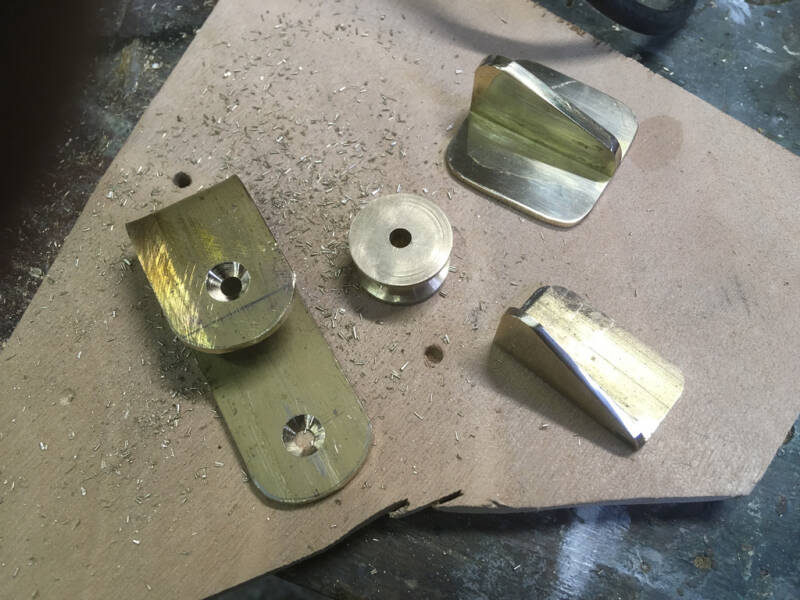

Such fun making it all yourself out of scrap brass.
A small brass cheek block and two clips for attaching shackles and blocks
Anchor supports (2023)


We made two small support out of Mahogany.
Fitting the Anchor (Grapnel)
Using bungee cord to secure it.
A Tiller Stabilizer (2023)


I called the device a tiller stabilizer but apparently it is called a 'Huntingford Helm Impeder' after its designer. You can find drawings on the internet.
Here the ring underneath the tiller is visible. This provides the right friction to hold the rudder on course. The advantage of thisdf system is that the rudder isn't locked. You can still move the rudder sideways in case you have to respond quickly.


A made a little brass "turtle block" under the tiller
I use the cleats to connect the lines for the impeder so I don't have to make more holes in the gunwale than necessary.
Making an extra paddle (2023)

Left over Douglas Fir, some small Red Cedar and Mahogany slats.


Made a slot on the table saw.
Here I glued in a slat of Afromosia (African Teak) for strength.


For making a good handle I made a small pattern to determine the shape.
I covered the shape with tape and sprayed it with spray paint to see what I could shave off.


By putting cross lines on the blade, the shape of the blade could be nicely planed; from convex at the top to flat near the tip.
Grandpa's old small round (toy)plane came in handy again for planing the handle.
Also for making the shaft I used some spay paint.


Experiment making a logo on transparant sheet using the printer.
Sanded it all with 220 grit.
Trailer adjustments and boat cover
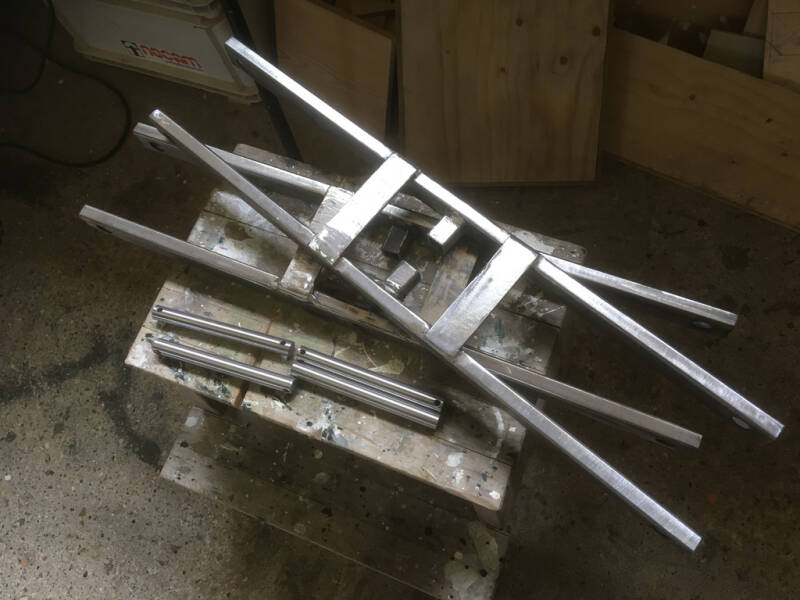


When launching we noticed the bilge keels got stuck on the side rollers. We made an adjustment by making a tilting part in the long direction to solve this problem. (first time MIG welding ever!)
We also made a pouch for the mast tip sticking out underneath the (standard bought) boat cover.

Boat Plate

At the school where I work we could make a boat plate using the laser cutter. One nice final detail.
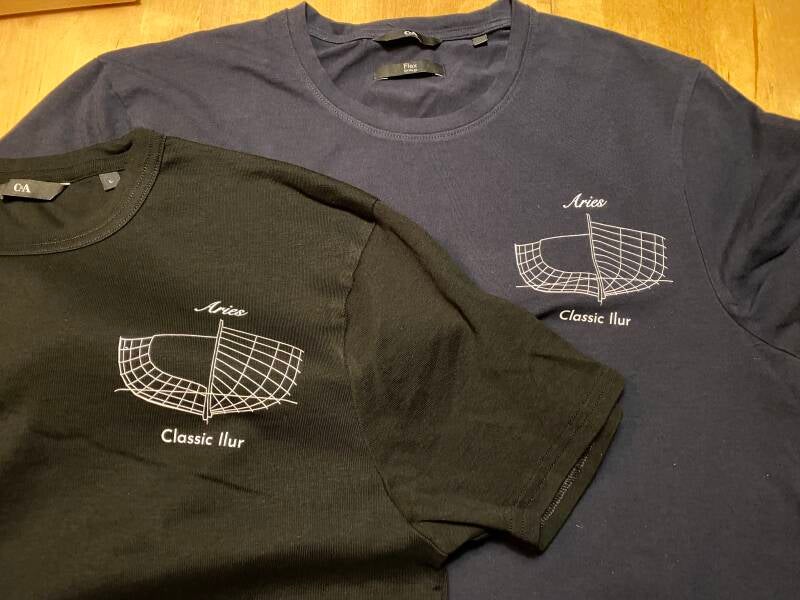
T-shirts
At school I made another gadget. T-shirts with a silk screen print of our boat plan and name. Just for fun.