

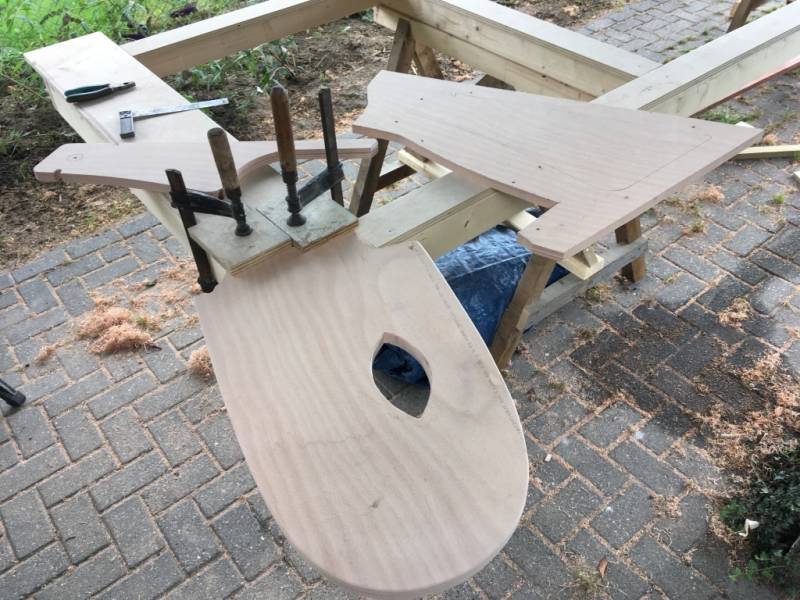
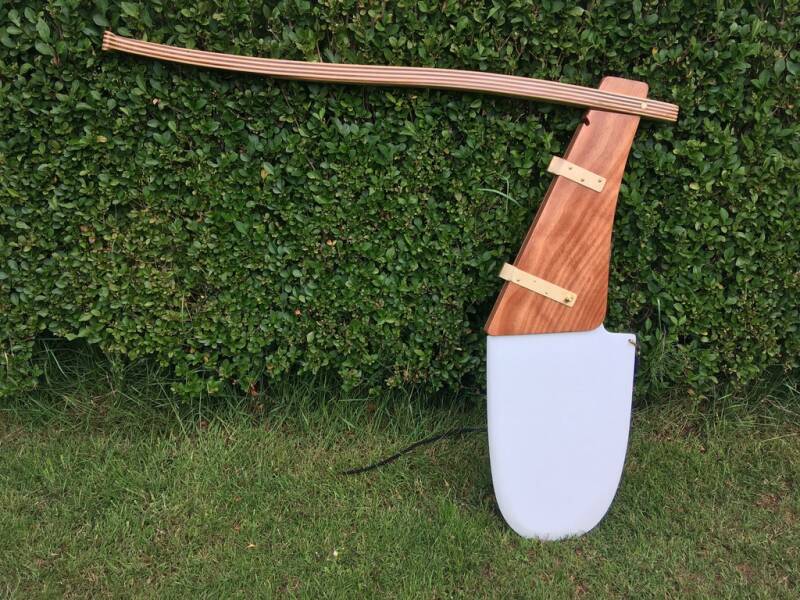
We had some leftover plywood and started making the rudder.


Gluing the parts together


Pouring lead in the rudder-blade
Later we used the router to make the lead flat so it was easier to cover up.


Covering the lead part with a Mahogany sheet.


First layers of Epoxy injection resign
The Tiller


We made a slightly bent mould for the tiller.
The tiller is made of Teak interspersed with American Maple. (Notice it is still wrapped up in plastic foil)


Using a lot of pressure.
This is what it looks like after planing.


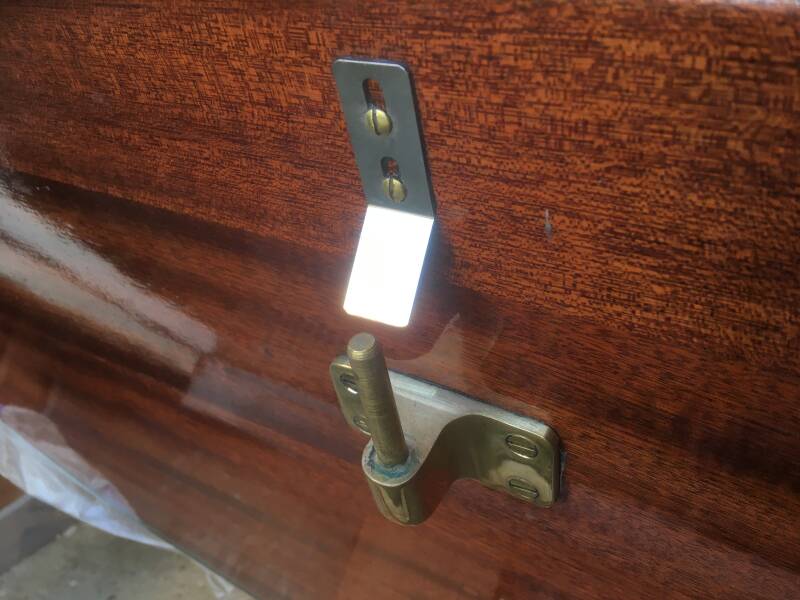
First layer of epoxy primer. Notice the brass hinge!


The tiller-handle is looking nice!
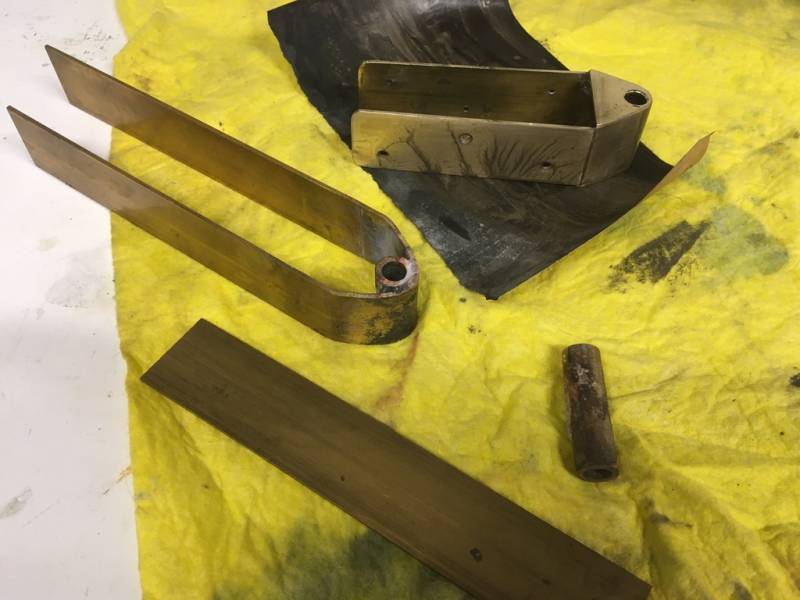
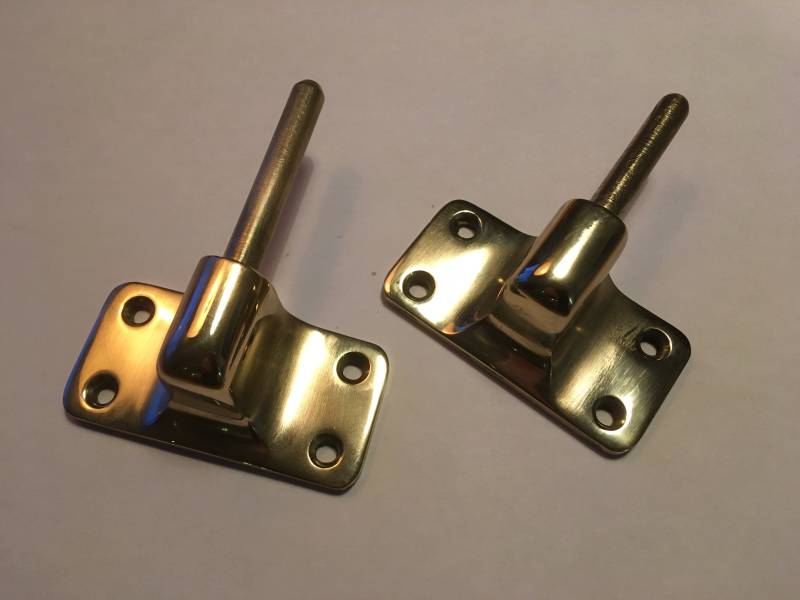
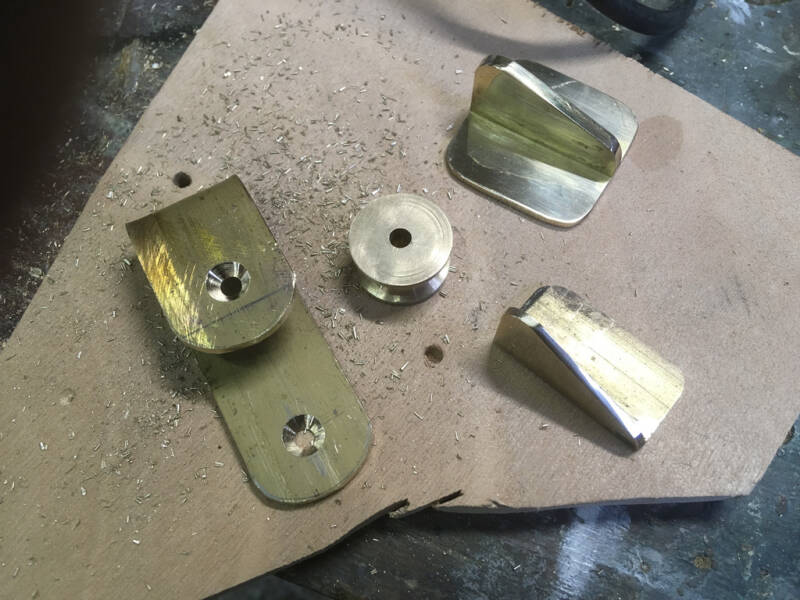
Making brass rudder gudgeons and pintles
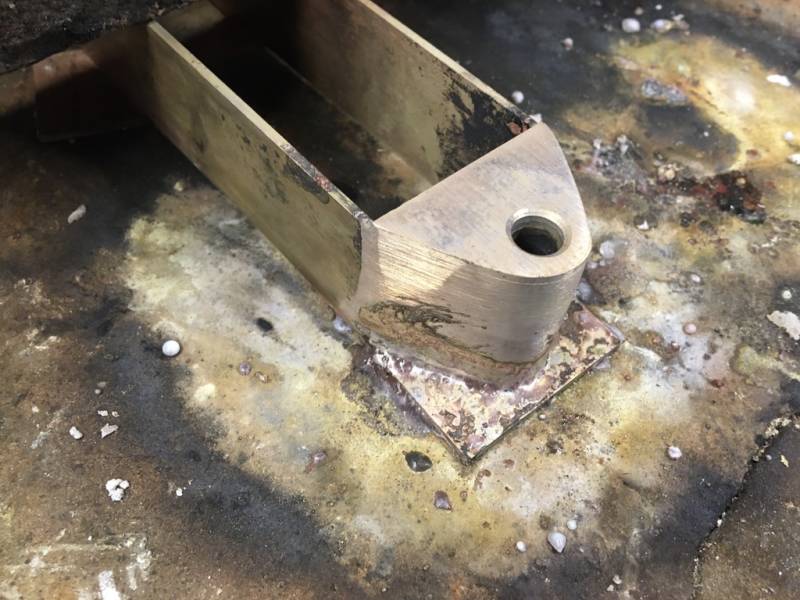
Brazed brass with silver
Covering the top and bottom sides with brass


Fitting the gudgeons
It's really starting to look cool, almost professional ;-)
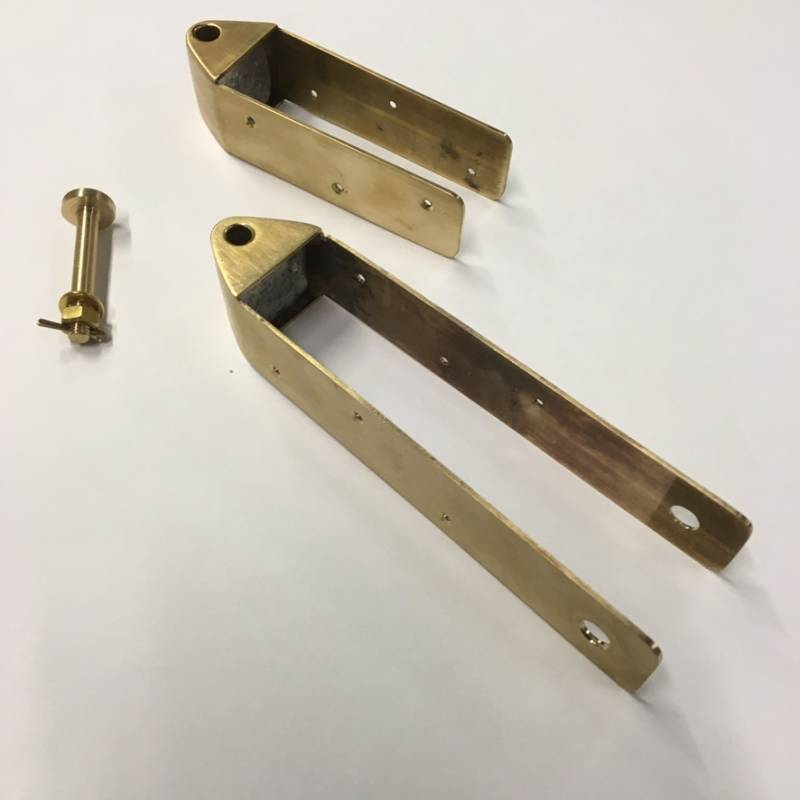
To hold the rudder blade I was able to make a brass pin using the metal lathe at the University where I work.


Making gudgeons mounting plates out of solid brass blocks.

Here we brazed the pintle into the brass block
Polished

The rudder completed
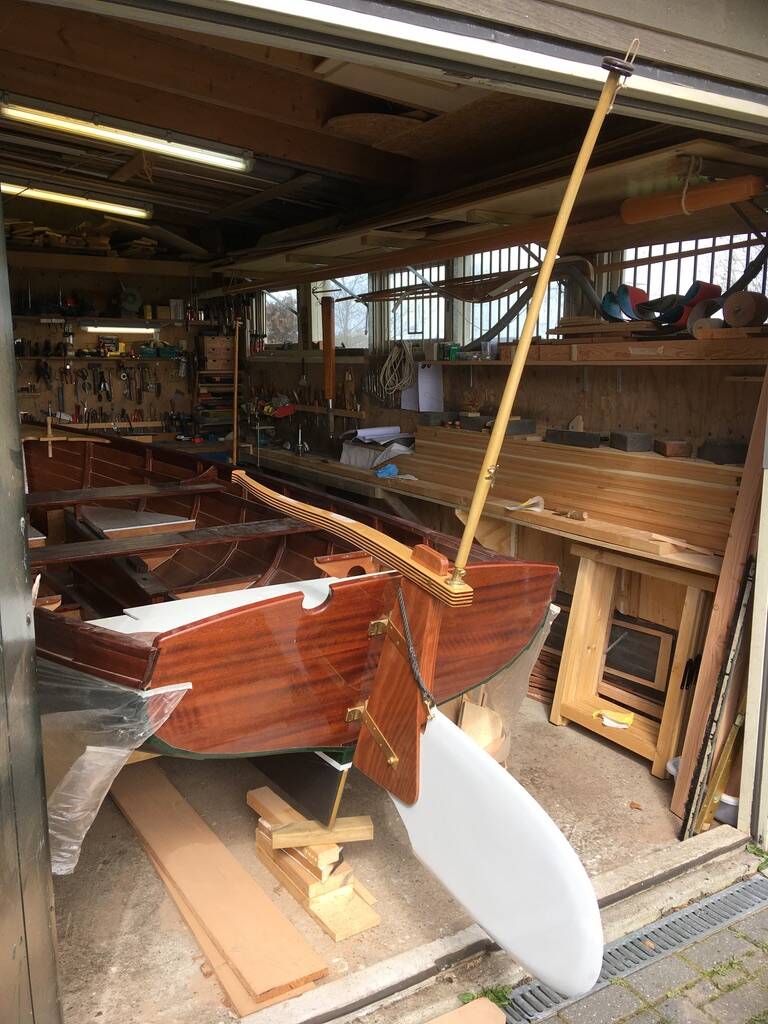
A year after we made the pintles and gudgeons today we finally attached the rudder to the transom and added a smal 'Optimist' retain clip to prevent loss due capsizing.


We added a home made sheave (Turtle Block) to lift the rudder blade.